

The Authority in Global Agricultural Chemistry & Bio-Resources
How to size chicken layer cages for the intended stocking density
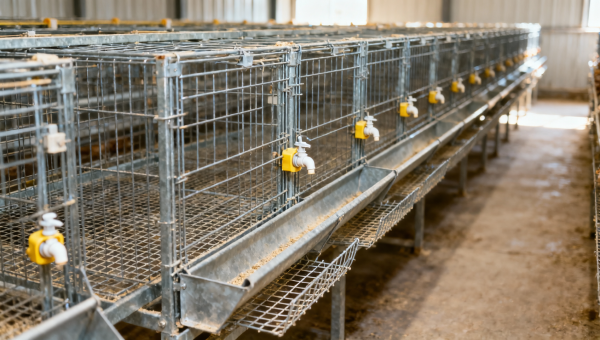
Size a layer cage by multiplying the intended number of hens by the required usable floor area per hen, then verify that the proposed compartment also meets feeder, drinker, height, and equipment requirements. The permitted bird count is determined by the most restrictive applicable condition—not floor area alone.
This matters when a supplier’s quotation lists a cage capacity without explaining its basis. External chicken layer cage dimensions may include egg collection space, structural members, or areas that do not qualify as usable floor. Accepting that capacity without checking the drawings can leave a project with fewer permitted bird places than planned, or require changes after the house layout is fixed.
Establish the stocking specification before selecting dimensions
Start with the rules governing the proposed farm location and production system. Cage housing may be restricted or prohibited, and requirements can differ between conventional and furnished systems. A cage that provides sufficient floor area is not automatically an acceptable housing system.
Record the applicable legal requirements, buyer specifications, and any welfare certification conditions in a design basis. Where several requirements apply, the layout must satisfy all of them. Do not combine a floor allowance from one housing category with equipment provisions from another.
The design basis should identify:
- The intended cage system and whether it is permitted for the project.
- The minimum total and usable area requirements, including any distinction between them.
- Minimum height, floor slope, and floor construction criteria.
- Feeder access, drinking provision, and any required nests, perches, or other furnishings.
- The intended strain, mature body weight, and group size.
Use the correct units throughout. A specification in square centimetres per hen is an area allowance; hens per square metre expresses density. They are reciprocals after unit conversion, so a larger area allowance means a lower stocking density.
Area allowance in cm²/hen = 10,000 ÷ density in hens/m².
Keep both values on the calculation sheet, but nominate one as the controlling input. This prevents a revised density from being applied to the equipment schedule while an earlier area allowance remains on the cage drawings.
Calculate the usable floor footprint
For a planned group of N hens and an applicable area allowance of a square centimetres per hen:
Required usable area = N × a.
Where the qualifying floor is rectangular, usable area is its qualifying internal width multiplied by its qualifying internal depth. Width and depth must use the same units. Irregular compartments require a measured area calculation rather than a bounding rectangle.
For illustration only, assume a project specification calls for 800 cm² of usable floor per hen and a compartment is intended for 10 hens. The required usable area would be 8,000 cm², or 0.80 m². A qualifying floor measuring 125 cm by 64 cm would provide that area mathematically. These assumed values demonstrate the method; they are not a regulatory recommendation or a complete cage design.
The same area can have several shapes, but those shapes are not operationally equivalent. Increasing depth while reducing frontage may preserve floor area while reducing feeding access. Dimensions must therefore be selected together, rather than treating width and depth as interchangeable.
For an existing cage, reverse the calculation
Floor-area capacity = usable area ÷ required area per hen, rounded down to a whole bird.
Never round to the nearest bird. If the quotient is 10.8, the floor-area ceiling is 10 hens. That remains only a preliminary capacity until the other requirements have been checked. Where separate minimum total-area and usable-area requirements apply, calculate each independently.
Separate the bird floor from the equipment envelope
Supplier drawings commonly show several different dimensions: compartment dimensions, overall cage depth, row width, and installation pitch. Only the dimensions recognized by the applicable area definition belong in the stocking calculation.
Require a drawing that marks the boundary of the counted floor. An external feeder trough, egg roll-out extension, or manure belt is not additional hen floor merely because it appears within the equipment assembly. Internal features also need careful treatment: whether a particular area qualifies depends on the governing definition and its accessibility, height, and function.
Do not automatically subtract every furnishing footprint either. Some systems distinguish total cage area from usable area, and the treatment of nests or other features can vary. The calculation needs an identified rule and a marked drawing, not an assumed deduction.
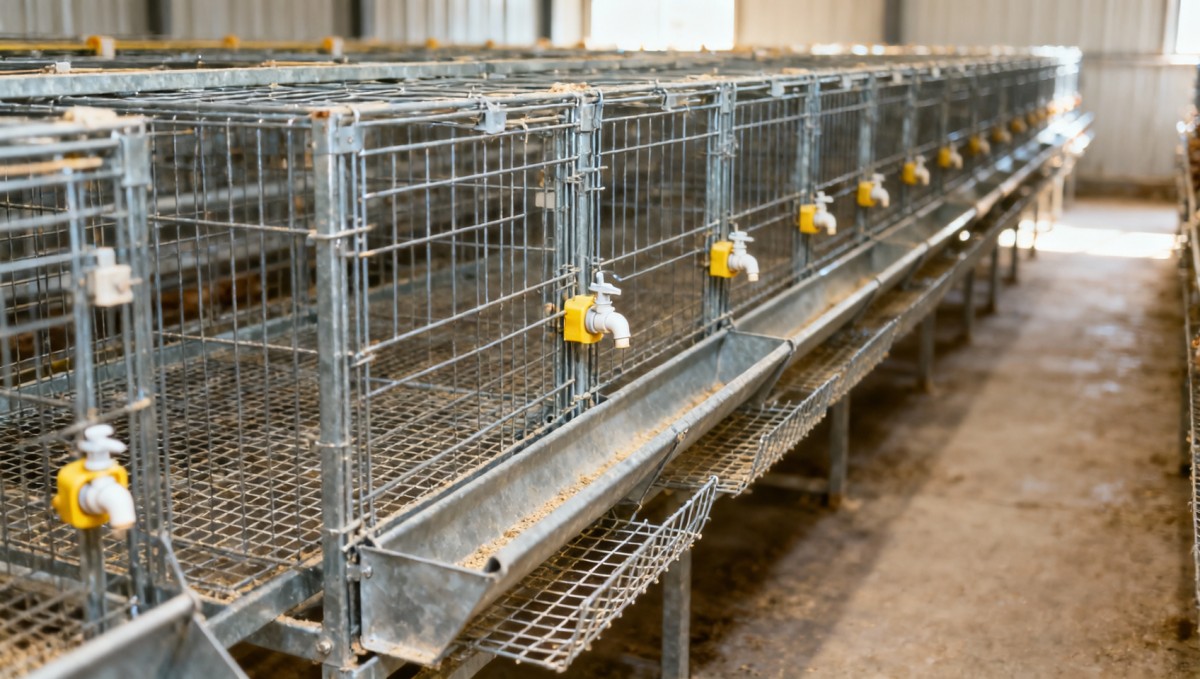
On a sloping floor, confirm how area is defined and measured under the relevant requirement. Do not assume the wire surface length is interchangeable with its horizontal projection. Check clear height at the relevant locations as well; a single maximum-height dimension may conceal a low section that does not meet the specification.
Request minimum finished internal dimensions, not just nominal dimensions. Partitions, support details, and manufacturing tolerances can reduce the actual space. A design that meets the area threshold exactly at nominal size offers no allowance for those differences.
Find the constraint that actually limits bird numbers
Once the preliminary footprint works, evaluate the complete compartment at the intended occupancy. The permitted capacity is the lowest capacity supported by all applicable constraints, provided the cage also meets requirements that are pass-or-fail rather than proportional to bird count.
For feeding, use effective accessible trough length rather than the overall length of the feed line. Supports, partitions, or inaccessible ends may affect what can be counted. Only count two-sided access where birds can genuinely use both sides and the applicable requirement permits that treatment.
Drinking provision needs more than a simple birds-per-nipple calculation. Some specifications require access to a minimum number of drinking points regardless of group size. Position matters too: a drinking point shown near a partition should not automatically be credited to both compartments. Verify physical access and confirm water delivery under the intended operating conditions.
Consider a purely illustrative compartment with a floor-area ceiling of 10 hens but feeding access sufficient for only eight under the selected specification. Its capacity cannot be stated as 10 without changing the feeding arrangement. Making the cage deeper would add area but would not correct the frontage shortfall.
Bird strain and mature size should inform the operational review even where numerical requirements are satisfied. Check access to feed and water, movement around furnishings, and safe bird placement and removal. If the intended flock differs from the supplier’s design assumptions, obtain a revised assessment rather than relying on a generic capacity label.
Translate compartment capacity into a workable house layout
After establishing the permitted occupancy of one compartment, calculate the cage-system capacity from the actual schedule of compartments, rows, and tiers. Use separate entries for different compartment types; end sections or shortened modules may not match the standard unit.
Installed bird places = sum of the permitted occupancy of every installed compartment.
This is not the same as final operating house capacity. The house must also support the proposed flock through ventilation, feeding, water supply, manure handling, egg collection, access, and emergency arrangements. More tiers increase bird places without increasing the building footprint, but also increase the load on those services.
Distinguish three dimensions when checking the building:
- Compartment footprint: the floor used for the bird-area calculation.
- Equipment envelope: the full assembly, including protruding troughs, belts, supports, and drives.
- Service envelope: the space required for aisles, inspection, cleaning, maintenance, and equipment removal.
A layout can fit geometrically yet remain impractical to operate. Check aisle clearance at protrusions, not just between cage frames. Allow for end drives, egg transfers, manure discharge, structural columns, and door openings before confirming row length.
Keep any management reserve separate from permitted cage occupancy. Planning to operate below installed capacity may provide flexibility, but it does not justify overcrowding another compartment or counting space that fails the usable-area definition.
Resolve drawing discrepancies before purchase approval
Ask each supplier to submit a compartment-level capacity schedule alongside the general arrangement. The schedule should show qualifying area, intended occupancy, resulting area per hen, effective feeder length, drinking provision, and the requirements used. This makes proposals comparable even when their module sizes differ.
Check that the plan view, section view, equipment schedule, and capacity statement refer to the same revision. A deeper compartment on a revised plan can change row spacing and maintenance access even if the quotation still shows the original house capacity.
Where a proposal appears to offer unusually high capacity, trace the difference to its source. It may use a different area allowance, count external dimensions, assume a different group size, or omit equipment constraints. The appropriate response is a reconciled calculation, not an arbitrary percentage reduction.
State acceptance criteria in the purchase documents: minimum qualifying internal dimensions, required equipment provisions, dimensional tolerances, and the agreed verification method. If compliance depends on a local interpretation of usable area or housing category, resolve that interpretation with the responsible authority or scheme assessor before fabrication.
Verify the installed cage before assigning the flock
At installation, measure representative compartments against the approved drawings and inspect locations where dimensions may differ, including end modules and modified sections. Check partition placement, floor profile, clear height, and feeder and drinker positions. Record discrepancies rather than averaging them across the row.
Recalculate any affected compartment using its verified qualifying area and actual equipment provision. A surplus in one compartment does not compensate for a shortage in another unless the approved system and governing requirements explicitly allow that arrangement.
The flock-placement schedule should identify occupancy by compartment type, not merely give a total house number. If the verified capacity falls below the project target, the available choices are to correct the equipment, add compliant accommodation where the building and services allow, or reduce placement. Adding birds to recover the original quotation total is not a sizing correction.
Related Intelligence
- Poultry Housing & CagingHow to size chicken layer cages for the intended stocking densityGet chicken layer cage dimensions right: learn to calculate usable floor area, check feeder and drinker access, and avoid costly stocking errors before you buy.
- Poultry Housing & CagingBattery Cage Buying Basics: Matching A-Type Systems to Farm LayoutBattery cage buying starts with the right layout. Discover how to match A-type systems to your poultry house, check compliance, and avoid costly installation mistakes.
- Poultry Housing & CagingBattery Cage Systems: A Buyer Checklist for Layer Farm ProjectsUse this battery cage buyer checklist to compare compliance, layouts, automation, and lifecycle costs. Avoid hidden project expenses and choose the right system for your layer farm.
The Morning Broadsheet
Daily chemical briefings, market shifts, and peer-reviewed summaries delivered to your terminal.