

The Authority in Global Agricultural Chemistry & Bio-Resources
Poultry Feeding Trough Spillage: Checking Height and Fill Level
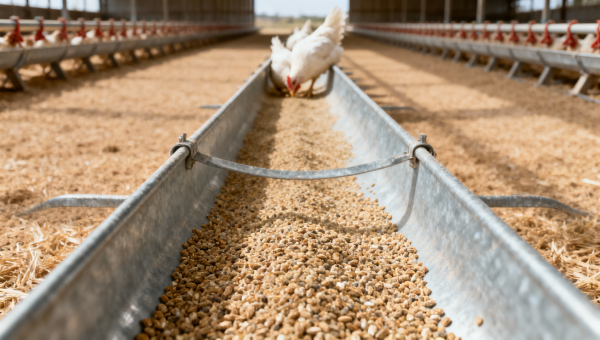
Feed scattered beneath a poultry feeder is a reason to check the feeding edge and the depth of feed before changing the ration or replacing equipment. A low edge may let birds rake feed outward; a high feed surface leaves little space to contain that movement. Raising the equipment or reducing the fill can help, but either adjustment can also restrict access if taken too far.
The practical aim is not simply a cleaner floor. It is less feed loss while birds continue to eat comfortably and evenly across the flock. Broiler management guidance treats feeder adjustment, feed availability, and observation of bird behavior as connected tasks—not separate settings that can be fixed once for the entire growing period. [1, 2]
Locate the spill before adjusting the whole line
Inspect the system during a refill and while birds are actively eating. Feed already mixed into litter does not show when or how the loss occurred. A fresh deposit beneath a joint suggests a different problem from particles thrown over an intact rim by feeding birds.
Use the location and timing to narrow the investigation:
- Feed directly beneath a connection or end cap: inspect the joint, seal, alignment, and surrounding metal or plastic before changing height.
- A ridge along the feeding edge: watch whether birds are sweeping feed outward and whether the feed surface sits close to the rim.
- Loss concentrated near a delivery point: check for a local mound, an uneven trough, or a distribution problem during filling.
- Spillage confined to one section: compare its supports, floor level, bird activity, and fill depth with an unaffected section.
- Feed displaced when the line starts: investigate movement, vibration, and delivery behavior rather than assuming birds caused it.
These patterns are diagnostic clues, not proof. Several faults can coexist. For example, a sagging section may sit lower relative to the birds and hold a deeper layer of feed than the rest of the line. Adjusting only the overall suspension could leave both local problems unresolved.
Record where fresh loss appears and whether it happens during delivery, immediately afterward, or throughout feeding. That short observation often gives the operator a more useful starting point than the total amount visible on the floor.
Set height against the birds, not a fixed floor measurement
There is no single installation height suitable for chicks, growing broilers, pullets, and adult layers. Equipment geometry also matters: an open linear trough, a guarded chain feeder, and a pan feeder do not present the same feeding edge. Use the flock management guide and equipment instructions for the relevant system. Broiler guidance specifically calls for feeder height to be adjusted as birds grow. [1, 2]
For a linear feeding trough, assess the rim, internal feed depth, and any grille as one arrangement. The rim must allow birds to reach feed, while the surrounding structure should limit opportunities to climb into it or sweep it out. A grille changes the usable opening, so matching rim height alone does not establish that access is adequate.
Watch birds approach and eat from the side. Can they reach the available feed without persistent stretching or repeated repositioning? Are smaller birds able to feed alongside larger birds? Does a guard obstruct access even though the trough itself appears correctly positioned? Bird behavior should be checked alongside the physical adjustment, as recommended in flock management guidance. [1, 2]
Check several points along the line. A suspension setting at one end says little about a low section elsewhere. On litter floors, assess the surface where birds actually stand; on other installations, check the relationship between the feeding opening and the birds’ standing position. Keep the equipment’s permitted adjustment range in view rather than compensating for an installation fault with an extreme setting.
Young chicks need particular care. Broiler guidance provides for early feeding arrangements that differ from those used later in grow-out. Do not apply a mature-bird anti-spillage setting to a newly placed flock merely because it produces a cleaner floor. [1, 2]
Check the feed surface, not just the controller setting
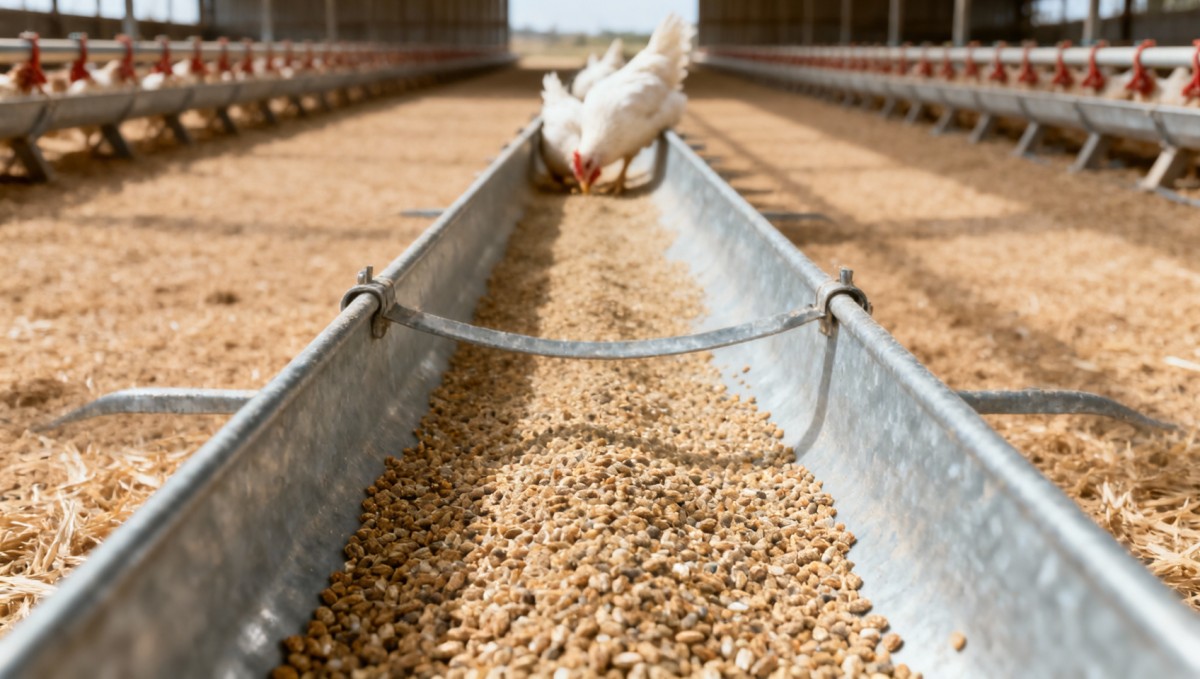
A controller setting describes an instruction to the system, not necessarily the depth birds encounter everywhere. Inspect the actual feed surface near the delivery point, between supports, at the far end, and wherever loss is concentrated. Compare those locations at the same stage of the feeding cycle.
In an open trough, feed close to the lip has little containment above it. Beak movement or displacement by neighboring birds may then push material over the edge. Reducing excessive depth can leave more of the trough wall available to contain feed. However, a shallow layer is not automatically adequate: birds must still have appropriate access throughout the intended feeding period. Feeder management guidance links adjustment with continued feed availability. [1, 2]
Aim for the lowest practical depth that maintains the required access under the farm’s feeding program—not the lowest depth the mechanism can deliver. Change the setting in a controlled step, then inspect both the fullest and least-filled sections. A reduction that works beside the hopper may leave another section inadequately supplied.
Timing is especially useful here. If feed passes over the rim during delivery before birds disturb it, investigate the feed setting, distribution, or local obstruction. If the trough contains feed properly until birds start eating, feeding height, depth, access, and bird movement deserve closer observation.
For chain systems, inspect the whole operating cycle rather than one still point. Do not use a lower feed setting to conceal a damaged joint, distorted trough, or distribution fault. Those defects require their own correction.
Run a controlled adjustment without hiding an access problem
Changing height and fill level together makes the result difficult to interpret. Where routine operation allows, adjust one variable at a time in a representative section and compare it with an unchanged section under similar conditions. This is a troubleshooting method, not a substitute for the flock’s feeding program.
- Record the starting condition. Note flock age, feed form, equipment position, fill setting, and the locations of fresh spillage. A photograph from a repeatable position can help document the comparison.
- Correct obvious defects. Resolve loose supports, open joints, or distorted parts before judging whether a setting is responsible.
- Make one permitted adjustment. Choose either height or feed depth, keeping within the manufacturer’s instructions.
- Observe a complete relevant cycle. Check delivery, active feeding, and the least-filled locations—not only the area that originally looked worst.
- Check access before retaining the change. Look for newly excluded birds, persistent difficulty reaching feed, or a section that is no longer adequately supplied.
Use comparable observations. A busy feeding period and a quiet interval are not equivalent tests. Likewise, a cleared floor gives a different starting point from litter containing several days of accumulated feed. If fresh material is collected for comparison, follow the farm’s hygiene procedures and use the same collection area and observation period each time.
Do not equate a lower feed issue with reduced waste. Feed delivered to the house is not a direct measure of feed swallowed. Review the adjustment alongside the farm’s routine intake and flock-performance records. A cleaner floor is not a successful result if birds have lost access.
Follow the equipment manufacturer’s isolation procedure before clearing blockages, opening drive guards, or making mechanical repairs. Observe moving equipment from a position that does not require reaching into it.
When height and fill level are not the main cause
If sensible adjustments do not resolve the loss, widen the inspection. Start with whether enough usable feeding space remains available. A long installed line can still have inaccessible sections because of blocked openings, damaged guards, or uneven feed distribution. Feeder-space provision and uniform access are established management considerations in broiler guides. [1, 2]
Watch the birds at the affected location. If they repeatedly displace one another or gather at a limited section, changing the rim height may not address the reason feed is being disturbed. Compare the used and unused parts of the system before assuming the flock needs a deeper fill.
Also record any change in feed form or condition. Pellets, crumbles, and mash should not be treated as interchangeable during diagnosis. Management guides distinguish feed form and physical quality as relevant to feeding performance. [1, 2] If spillage begins after a feed change, compare delivery records and retained samples rather than attributing the change immediately to the equipment.
Inspect the hardware for worn edges, loose covers, deformed guards, and trough sections that move excessively. Keep dust and whole-feed loss separate in the record: an airborne deposit and a pile of intact pellets may require different investigations.
Select equipment that operators can adjust and verify
For commercial farms replacing or expanding a system, spillage control should be assessed through the details of installation and daily operation. A nominal capacity does not show whether staff can maintain an even feeding edge, inspect distant sections, or adjust feed depth consistently.
Useful procurement questions include:
- Adjustment range: Does the system accommodate the intended bird type and growth stages, and are settings repeatable?
- Feed-depth control: Can operators inspect and adjust the actual depth along the line, rather than relying only on a hopper setting?
- Access geometry: Are the rim and grille suitable for the flock, with clear instructions for changing settings?
- Support and maintenance: Can the installed line remain level, and can worn joints, guards, and supports be replaced?
- Cleaning access: Can staff inspect corners and connections without leaving damaged or poorly seated parts after reassembly?
Ask for installation instructions, operating limits, maintenance requirements, and replacement-part information. Where a trial is possible, assess distribution and bird access under representative conditions rather than judging the system only while empty.
The operating target is a stable relationship between bird size, feeding-edge position, and available feed depth. Keep a height or fill adjustment only when it reduces fresh loss without creating a new access problem. Where one section still spills, return to that section’s geometry and delivery behavior instead of repeatedly changing the entire house.
Sources
[1] Aviagen. Ross Broiler Management Handbook, 2018. Feeding management guidance covering early feeding, feeder management, feeding space, and feed physical quality. Used here for general broiler-management principles, not as a universal specification for every poultry system.
[2] Cobb-Vantress. Cobb Broiler Management Guide. Guidance on feeder systems, feeder adjustment, feed access, and feed quality. Equipment-specific settings and practices for other poultry classes should follow their applicable management guides and manufacturer instructions.
Related Intelligence
- Feeding & Watering SystemsChoosing a Livestock Feeding Systems Exporter: Delivery and After-Sales SupportChoose a livestock systems exporter with reliable delivery, clear installation terms, and responsive after-sales support. Discover what to check to reduce downtime and protect your investment.
- Feeding & Watering SystemsPoultry Feeding Trough Spillage: Checking Height and Fill LevelReduce poultry feeding trough spillage with practical height and fill-level checks. Discover how to cut feed waste while keeping every bird’s access to feed in focus.
- Feeding & Watering SystemsFeed Production Systems for Dairy Farms: Sizing for Herd Size and Ration NeedsSize feed production systems for dairy farms to match herd size, ration needs, and feeding schedules. Discover how to choose capacity, avoid bottlenecks, and plan for growth.
The Morning Broadsheet
Daily chemical briefings, market shifts, and peer-reviewed summaries delivered to your terminal.